Showing posts with label DIY Makeover. Show all posts

Monday, July 12, 2010

The Pine Monster Gets A Distressing Makeover

I mentioned a while ago that I really wanted to do something about the monster that lives in the corner of my living room...


It's useful for hiding the TV (no sleek sexy flat screen for me) that is quite fat and extraordinarily heavy.  Still, even if I did have a lovely new TV, I would want to hide it.  TVs aren't pretty to me and I don't like looking at them unless they're turned on.  But I digress.

Last week I took on the 80s pine monster and now she looks like this...


Two coats of paint, some sanding to achieve a distressed look and toner, along with one final "wash" with a mix that was three parts water and one part latex paint and I'm back in love with my armoire.  I no longer see her as the big ugly monster hogging the corner of the living room :-).

I even like the top of the piece that I had grown to hate for it's fancy scroll work that just screamed 80s at me.
 As you can see, I did put new hardware on the doors, but I don't love it.  It looked great immediately after the painting, but once I started using the toner and darkening the piece more, the white knobs were just too...well, white.  I'll keep them until I find something else for a price I'm willing to pay (if cost were no object, I'd head over to Anthropologie and pick up some but, that's not in the budget).


Now, if you'll excuse me, I have to go find something else to paint :-).

Wednesday, June 2, 2010

Living Room Paint Job

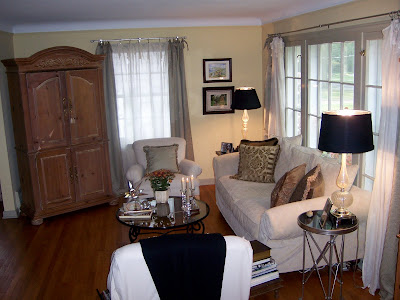
Post painting, I took a few quick shots of the living room, but only one really comes close to showing the difference in color.  I guess because my before color was a softer yellow, the new ivory shade doesn't read as all that dramatic a change in pictures.  I do love it though.  And I realize now that I could have gone even lighter and still been happy, but this was a solid choice.

The BEFORE...


and the AFTER....


As you can see, I haven't done the switch to warm weather decorating (pulling up rugs, "warm" pillows and throws, etc.  Not sure it'll happen this year ... too much going on. 

Still on my to do list for this room: 
1. Paint the armoire
2. New pillow to replace the one with fraying fringe (possibly several new pillows)
3. Re-do mantle ( have some fun things in mind using my new thrift store purchases...stay tuned)
4. Bamboo (I would take matchstick too) shades to replace the linen sheers.  I haven't been able to find the size I need via my favorite source (overstock.com), but I'll keep looking.

Small changes = a little more bliss.

Friday, May 7, 2010

So Worth the Time!

I finally reached the light at the end of the tunnel last night as the curio cabinet makeover was completed.

This, like so many projects, turned out to be a bit more involved than anticipated.  Why the drama?  One word people, glass.  Six panels of glass and a long mirror in the back of the curio meant all of the inside of the cabinet had to be painted too.  Not sure why I failed to fully grasp that fact prior to beginning, but let's just chalk it up to a blond moment and move on.  There was much switching back and forth with big, small, very small and tiny paint brushes to reach all the nooks, crannies and nether regions in this piece.

Overall, I'm very happy with the results.  My hideous 80s cabinet looks almost hip (don't go making any nasty comments either - I said almost hip.  I'm happy with it but not delusional).

With no further ado, here are some snaps of the after.  If you want a quick reminder of the BEFORE photos, check out this post.  If you want to try out the products yourself, scroll to the bottom for some tips.

 
I used a product called Caromal Colours Country Living for the makeover.  It's a paint that's designed to give a piece of furniture a distressed look.  It requires zero sanding or prep (beyond wiping down the piece to insure it's clean and dust free) before painting.  You just paint it on and then sand only where you want a distressed look.  You can make it very distressed or only lightly distressed.  I went with very light distressing as I was trying to get away from the country look of the piece.


I gave the cabinet some new bling to go with its new look...


Now that that project is done, I plan to tackle this monster next...


Not sure what color it will be, but the pine has to go.

Quick tips I learned while working with this paint:
  • No drop cloth needed when painting - this stuff is so thick the paint brush stands up in the paint.  You do need to lay down something down when you use the toner which is very drippy.
  • Definitely add a little water to the paint or you'll go through too much too quickly.
  • You don't need the gloves they give you when you paint, but you will definitely need them when applying the toner - had a tough time getting it off my hands.
  • They do give you a small paint brush with the kit, but would recommend you have some larger and smaller ones handy before you begin for larger or tight areas.
  • They recommend using a mish mash approach when applying the paint, but I used more of a traditional stroke when applying and achieved a smoother look than you see in the pictures on their website.
Good luck on your project!

Wednesday, April 28, 2010

Curior Makeover Update

The curio makeover is under way, but still much work before it's ready for prime time.  After completing the first coat on Monday night, I noticed Tuesday morning that there was still a lot of the original finish showing through.  I decided I need a second coat before I get into the sanding phase.

I also had the unfortunate realization that I would have to do the inside of the piece too because it's so visible with all the glass.  Heavy sigh....  So wasn't on board for that.  See what I mean?  What made me think I could get away without painting the interior?  Duh!


I did start on the inside and do a second coat on the outside last night.  I am out for a while tonight, but am hoping to finish enough of it to be able to sand and apply toner (the final step) on Thursday so that it's complete by Friday.

Wish me luck!

Monday, April 26, 2010

Caromal Colours Curior Makeover

I have long been fed up with my armoire and, to a lesser extent, my curio cabinet.  They look oddly like a pair, although I purchased them several years apart from different manufacturers.  They are the lovely scrolled pine pieces from the 80s.

Still, both serve an important function in my living room; the armoire hides the TV (don't believe I'll ever reach a point where a visible TV is okay with me) and the curio holds my bar ware and Waterford Lismore collection.

I wanted to replace the curio cabinet with a vintage bar cart, something like this brass one...


or this French number for just $1,020...


or maybe this gorgeous black Indochine bar...

or go contemporary with this shiny baby from Restoration Hardware.


Alas, there were two primary issues with this wish of mine...cost and space.  The snug little space I wanted to put a bar cart it in was not large enough to accommodate virtually anything I liked and the couple I did like I wasn't willing to spend four figures on (um, not that I even had it to spend mind you).

So, a makeover of this piece was in order and after much studying the work of others and stewing over the issue, I hopped online and ordered this kit from Caromal Colours.

Here's your little peek at the before:


See what I mean by the 80s scrolled look?


And then there are the dreaded bun feet!!! Actually bun feet are fine if you have an updated version; these are not updated.

Here's a shot of the contents.  I just don't have anywhere else in my house I can store these or, more accurately, enjoy them in easy reach.


Check back for the BIG REVEAL (insert big important music properly conveying the bigness of this reveal).

xo,

Christine

Tuesday, March 2, 2010

One More DIY For My Dining Room

After pulling together my new dining room, I left one wall sadly blank while I pondered what to adorn it with.  Here is the lonely wall (below).  You can see why it needs somthing right?


None of the art work I already owned really did the trick, so I decided on another mirror.

After a brief search at Home Goods (of course), I found what I was looking for in the form of this mirror (love the arch):


It was priced at $29.99, but the wood frame was badly scratched and even gouged in spots, so some haggling later, I got a $5 discount.  Not what I was hoping for, but I really liked the mirror and knew the size was perfect for the wall in question.  

BTW, objects in mirror are not nearly as fat as they appear - that was a bulky sweater - it's very cold in Cleveland right now.  Just wanted to make that clear.

A major dose of sanding and three coats of the same glossy black paint I used on my other dining room mirror and the tray table and my new mirror was ready for its close up.


Here it is occupying the formerly lonely wall.  My original plan was just to stain the mirror a dark brown as I feared it would look to "matchy" if I used the same glossy black paint on the tray and the mirror, but I do like the overall effect.  


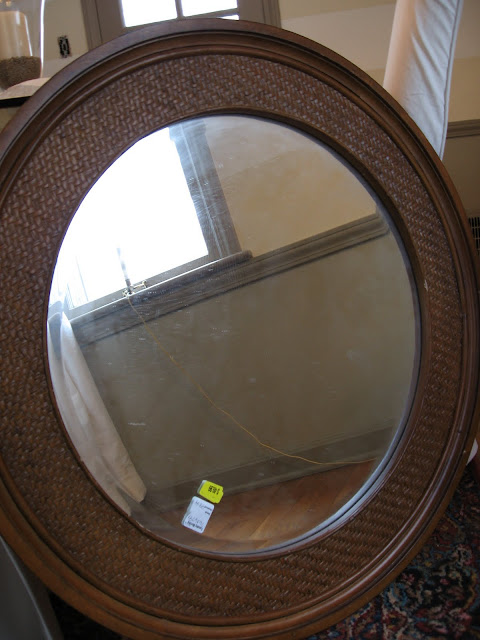
The one big disappointment was that after I cleaned up the mirror, I realized it was covered with fine scratches (visible in the photo below) that were not noticeable when I bought it because of the tape marks, dust and paw prints on it.  Anyone know how to get rid of those scratches?  

Still, in spite of its imperfections I'm quite pleased with my new mirror and at a recent get together with the girls (before I purchased and hung the mirror), I turned the tray table into a drinks station and it worked really well and kept the main table free for the food. 

That's my DIY for the week - unless I get another burst of energy.    
Wealth Consists Not of Having Great Possessions but Few Wants. Epicurus We Americans are drowning in stuff we don’t need.   Buying things you don’t need takes up a lot of life energy that could be used to buy your freedom from debt, among other things.   Next time you go shopping, ask yourself if what you are purchasing is a want or a need.  If it’s a want, think twice about what it’s actually costing you. 

From TUESDAY TIPS - WISDOM FOR EVERY DAY LIFE

Thursday, February 11, 2010

Tray Table Makeover

Sorry for the lack of posts for the past few days.  My mom had some surgery and I spent a couple days with my parents helping out.  They have dial up so posting was not really an option without extreme frustration.

Now that I'm back home and have unburied my driveway and dusted off the laptop, I wanted to share my tray table makeover.  You'll recall this post where I mentioned that I had decided to use some of the glossy black paint purchased for my mirror makeover on my old Pier One tray table.

Here is the made over version in my dining room:


The hardware change is my favorite part of the makeover.  Here is the BEFORE:
 

The hardware I really lusted for was this drawer pull from Anthropologie, but at $24.00 each it wasn't an option.

So, one trip to Home Depot later, I bought these simple pulls for $4.00 each.

The AFTER:


 My only caution with the glossy paint is that it picks up every flaw on the piece (as you can clearly see), but flaws don't bother me.  As The Nester always says, It doesn't have to be perfect to be beautiful.


Monday, February 8, 2010

My Mirror Makeover

A couple weeks ago I showed you the mirror I scored at Tuesday Morning for $25 for my dining room makeover.  Three coats of glossy black paint later it's hanging on my newly striped dining room wall and I LOVE IT.

I will show you the completed Dining Room as soon as I get the seagrass rug down (it arrived today -  but I need to buy a rug pad for it first) and then things will be complete. In the meantime, here is the mirror's before and after makeover.

The BEFORE...

 
And the AFTER...


Soooo happy with my mirror.  Now go find yourself a bargain and feel the love :)


Monday, February 1, 2010

If You Don't Like It, Paint It!

As I was putting yet another coat of glossy black paint on my thrifty mirror purchase over the weekend, I decided to give my little butler's tray table a makeover too.

I bought this simple little piece years ago at Pier One Imports and I have no idea what I paid for it.  Many of the accent pieces in my house at that time were from Pier One because after buying the house, I had no money to furnish it. Funny how that works.

Please excuse the crappy photography. 


Here is a close up of the hardware on the piece that I will replace as it's a bit too rustic to fit the dining room now.
 
The tray table needs one more coat of paint and then I can put the new hardware on it and show you the "after". 

I would rather show you the "after" version of the mirror once it is hung and that's not happening until Friday.  I have too much going on with work this week so it's going to have to wait.

Friday, January 29, 2010

Score! Persistence pays off.

Ever since beginning my dining room makeover, I have been trolling the local thrift and resale stores, Home Goods, Tuesday Morning and even Target in search of the perfect mirror.  Or more accurately, one I really like and can afford.

Yesterday I hit pay dirt.  I spotted my mirror at Tuesday Morning. 


Yes it's the wrong color and a little banged up, but people it was $24.99!
  

A little sanding, a little lot of paint and it will be good as new and perfect in it's new home.

I'm so excited.  Stay tuned for the unveiling of the new and improved version.

Thursday, January 28, 2010

Dreaming of City Life

Have you ever fantasized about living in a cool hip townhouse in the city (New York of course)?  Any big city really, but mostly NYC.  Not the cramped 4 people living in a one room apartment type situation, but a really sweet flat in the coolest neighborhood? 

Although I love my little abode in the burbs, I sometimes wonder what it would be like to live the NYC girl life with the heart of the city at my doorstep. 

I especially love old townhouses as it's a charm that can't be duplicated with a house.  Whenever I go on vacation, I love to find the old neighborhoods with the most town homes and just walk up and down the streets admiring them.  Every one is so unique and beautiful. 

I can't even remember how I found the site, but I occasionally go to a website that markets city properties and peruse the photos.  This one is a gem inside, but lacks the charm you can usually expect with older town homes.


It's listed as a 3 unit town house with a total of 4,762 sq. ft. and it's occupants clearly have vastly different decorating styles.

The first unit...


The next unit is super sexy and colorful.  This looks like the inside of I Dream of Jeannie's bottle, albeit a more neutral version than Jeannie had.


And then you step outside and find this little slice of heaven...

Can you say party?  Oh the cocktail parties you could host here.....

I'm trying to decide who's been sleeping in this bed.  There are definite masculine elements with the rug pattern (seems masculine to me anyway), leather cubes, leather chair and the flat screen TV hanging on the wall.

But, most men hate excessive pillows and this bed has five in various patterns and fabrics as well as a few on the upholstered piece on the right side of the room.  The window treatments are soft and beautiful, but the brown fabric "framing" them seems like a more masculine touch (although I would take them in a heartbeat).

Maybe it's a couple?  Well, I think it's a guy.  What do you think?


Love the subway tiles in the bathroom and the clean crisp look of all white.


This unit is ultra feminine with a shabby chic style.  I'm surprised there is no window treatment.
 

I love her kitchen with the open plate display rack and the frosted glass cabinets.


Since there are only three units, I'm assuming this is her bedroom, but it's definitely lacking in the charm of the other rooms.  It looks like she started to cozy it up with the cute little green chairs, but that rug doesn't fit at all. 

And it is possible to have all white bedding that isn't boring, but this would not be a good example.


Just a little tour of how the other half lives to make you appreciate your own cozy little home :).